I have been designing my own blog for the past two years. The current template was created using Frontpage 2003 and Photoshop CS2. The background of this blog is filled with a pattern that I created using Photoshop. Having pattern as your background make your website more interesting and it is a better alternative than using only colours to fill the background.
In this post, I will try my best to explain the steps involved in creating and managing your own pattern in Photoshop :). This tutorial will be quite lengthy as it is my intention to wrote this tutorial for the beginners. If the picture are not clear, please click for larger picture ;).
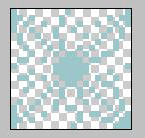
The objective of this tutorial is to create the image as shown below.
 This tutorial will explain how to use custom shape as a pattern and save the new pattern in Photoshop.
- Create a new file with size 20 x 20 pixel and make it transparent.

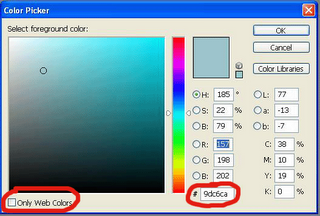
- Next, choose your forecolours. Check the picture below. Double click the black box.
[Note that the black box represent your foreground colour and the white box represent the background colour. It may not be the same colour depending on the previous colours you used in the past]

- A new dialog box will appear and ask you to choose the colour. Make sure you do not click the box 'Only Web Colors' and put in 9dc6ca as your foreground colour.
[For the purpose of this tutorial, the pattern that will be created is based on this blog. Thus the colour chosen will be the same as mine :)]
 With the same technique, choose your background colour by clicking the white box instead of the black box. Put c5d1d0 as your background colour.
 - Next, you need to choose custom shape tool.
[Custom shape tool give you the ability to choose various shapes that are available in the photoshop]
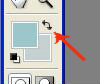
Check the red arrow on the picture below. The picture shows the location of custom shape tool but at the moment it is hidden.The square shown in the picture represent the rectangular tool. Right click at the square....[In the Tools, there are more options shown but most of them are hidden. Can you see the small black triangle at the bottom right of the square? The small black triangle indicate there are hidden tools. If you check the rest of the tools, there are a lot of those small black triangle. Give it a try to check what kind of tools are available :)]

- And, a dialog box will appear. Click custom shape tool as shown below.

- Next, a new option will appear at the top of the window. Click as shown in the red box.

[Everytime you click any tools, there will appear a new option on the top of the window. It is not exactly top though, the option will appear below standard toolbar {File Edit Image Layer etc}]
- Next, click the small black down arrow as shown in right red box. Choose unconstrained.

- Next, we need to choose the custom shape that we would like to use. First, click the black down arrow next to the black bird (The image may be differ from yours depending on the last shape you used). A new box will appear. Click the down arrow as shown in the picture below. Then, choose Ornaments.
[This step shows how you can replace and choose any custom shape available in Photoshop. There are few categories available]
A dialog box will appear and ask you whether you want to replace the current shape with ornament.csh.Click OK.[If you click ok, the Ornament shape will replace the current shape and by clicking append, it will add ornament shape to the current one.]

- Next, choose this shape :)

- Since the file is only 20 x 20 pixel, we need to zoom in before applying the ornament shape.
 So, find the navigator tools on your top left and click as shown by the red arrow. Click it until you reach 600%.
 [The navigator tool is an important tool. If you zoom out and want to move to another part of the image, the easiest way is to drag the red box in the navigator tool]
- After zoom in the image, apply the shape. Drag your mouse from top-left corner of the image to the bottom right corner. Make sure the ornament fit the whole box. The image should look like this...

- Next, we need to create a new layer. Go to the layer tool on bottom right corner and click the symbol as shown in the red box.
[The symbol is a shortcut to create a new layer. Tips: if you drag layer 1 to that symbol, a duplicate layer will be created. If you drag any layer to the dustbin ie the symbol on the right, the layer will be deleted]
- A new layer will be created. Layer 2.
- Next, we need to change the foreground colour to the background colour.
 Go the foreground tool and click the arrow as shown in the picture. This will change your background colour into foreground. The foreground colour now should be lighter than the background.
 - Make sure you have clicked layer 2. Now, choose fill tool and choose fill foreground as shown in the picture.
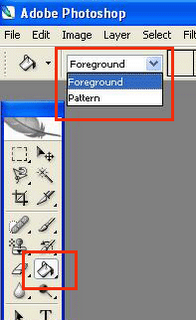 The mouse now should change into a paint bucket. Click the mouse on the empty area of the image and the foreground colour should fill the entire image.
 - If everything is right, the workspace should look like this.

- Now, we need to move layer 2. Drag layer 2 below layer 1 and now it should look like this.
 The image should be looking something like this now...


 The final step is to save this image as a new pattern. Click Edit / Define pattern / and put whatever name you like.
Next tutorial will explain on how to apply this pattern such that it can be put into as background of the blog :)
No comments:
Post a Comment